About
Typing Tool PRO allows CX researchers to combine the power of X-data and their customer segment models to facilitate understanding and to help shape future experiences. This solution applies formulas from previously run segmentation analyses to newly collected survey data. These formulas can be created from multiple types of analyses (linear discriminant, k-means, etc.) and are comprised of coefficients that are associated with each survey response to produce scores that can assign a survey respondent to the appropriate customer segment automatically at the time of response. By reducing efforts to manually segment your respondents, you drive action faster in your organization.
Prerequisites
xFlows is required to set up and configure this extension.
Installation
Once QuickLink has been purchased, provide Walker with the Brand ID of the Qualtrics instance. Walker will provide access to the plugin. Once the task has been shared, a brand admin will need to enable the plugin from within Qualtrics using the Extension Admin page.
Setting Up a Typing Tool PRO Task
- Go to the Workflows tab.
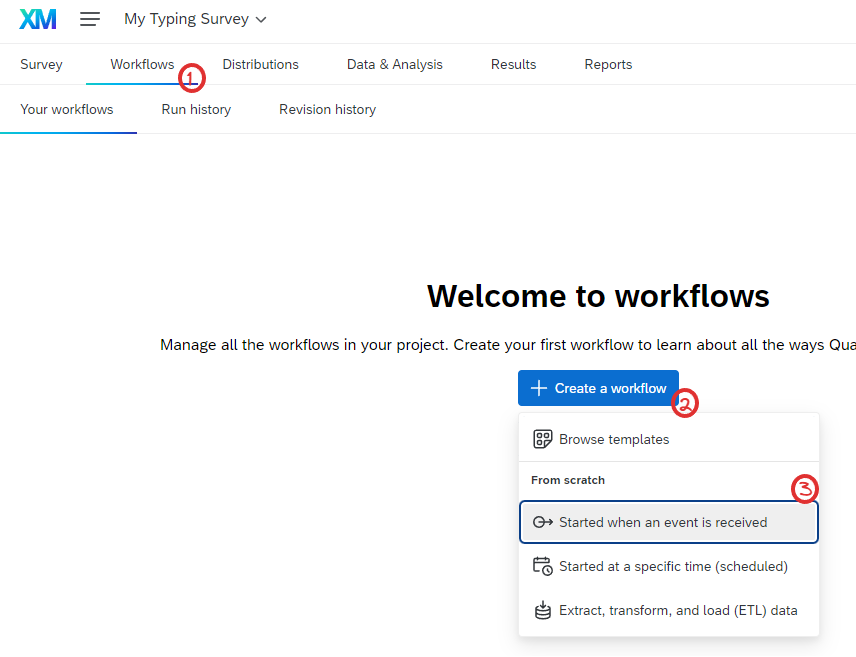
2. Click Create a workflow.
3. Click Started when an event is received and configure your workflow trigger.
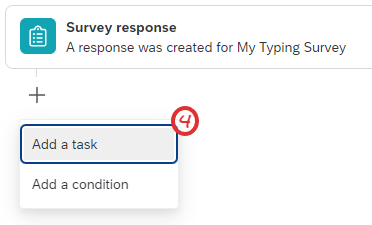
4. Click the plus sign ( + ) and select Task
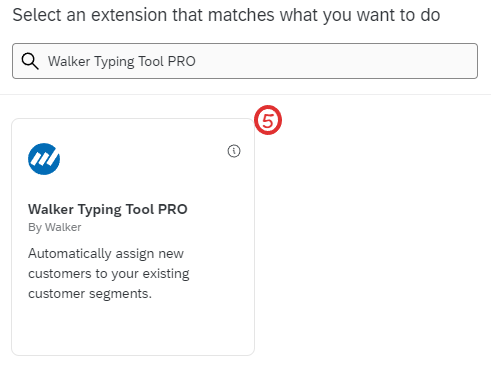
5. Select Walker Typing Tool PRO as your Task
6. Use piped text to map questions from your survey to your model’s coefficients. All coefficients must be mapped, and all values must be numeric.
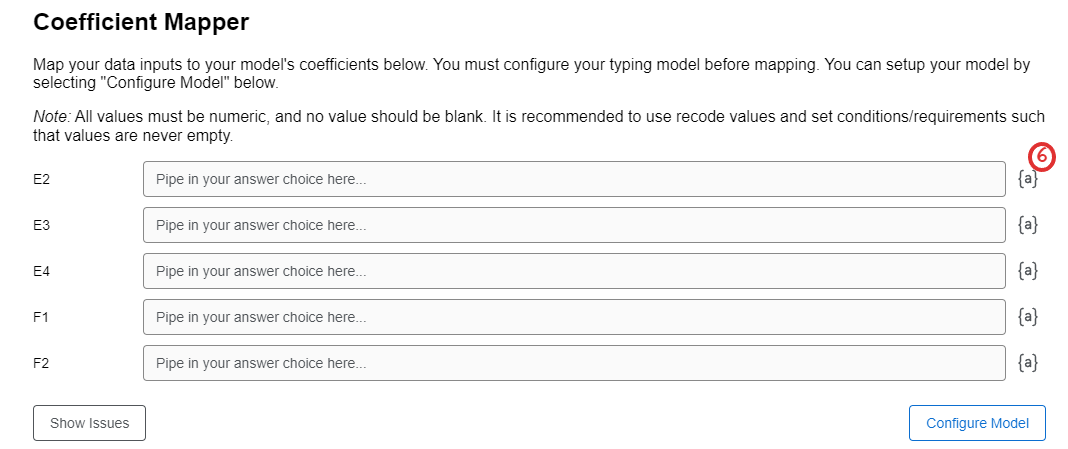
Tip: Use recodes to ensure only numbers are being passed as values.
Tip: You must configure your typing tool model before you can map your survey questions to your coefficients. See Configuring a Typing Model
7. Click Save to finish editing the task and save your progress.
Configuring a Typing Model
1.. Click Configure Model to open the segment configuration panel.

2. Click Create new Segment

3. Change Segment Label
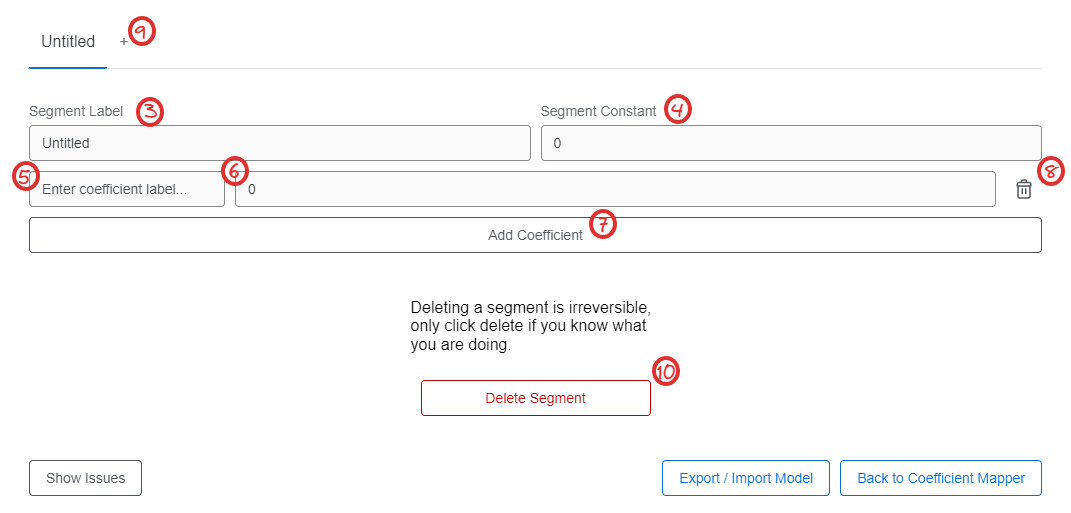
- Change Segment Constant
- Enter Coefficient Label
- Change Coefficient Value
- Click Add Coefficient to add additional coefficients as desired.
TIP: Segments share the same number of coefficients and labels, but the values are different between them. When adding a new coefficient to a segment, remember to add the values to all other existing segments as well.
- Click on the trashcan button to delete a coefficient.
WARNING: This deletes coefficients across all segments. If you accidentally delete a coefficient you will need to reconfigure a new one across all segments.
- Click the plus sign ( + ) to add additional segments, repeating the steps above to configure them.
- Click Delete Segment to remove a segment.
WARNING: This is irreversible. If you accidentally delete a segment you will need to reconfigure the segment labels, constant, and coefficients again.
Exporting / Importing a Model
- In the Model Configuration panel, click Export / Import Model.

2. You can edit or copy the current model configuration from the textbox as JSON
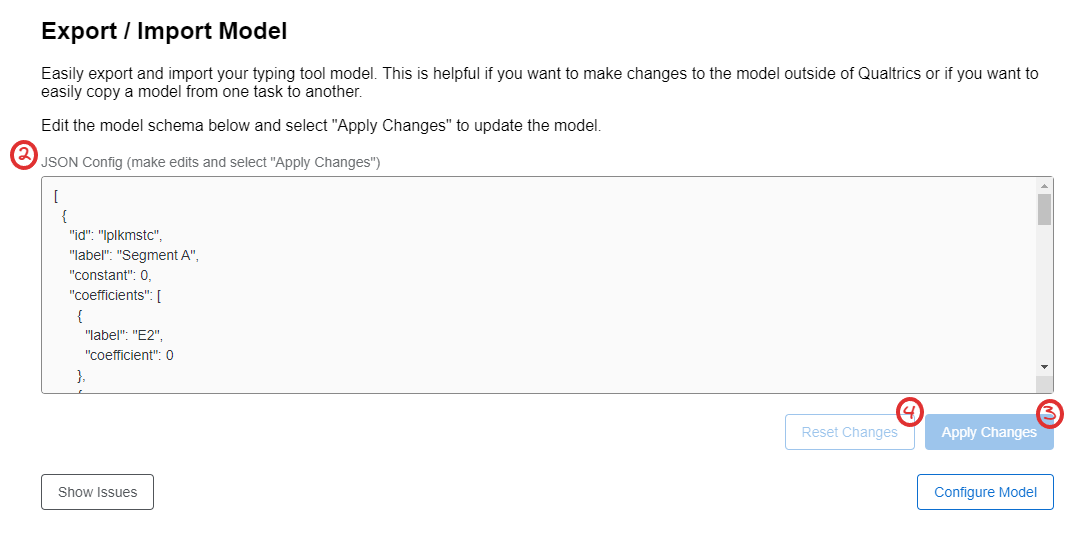
- Apply Changes after any edits made.
- You can click “Reset Changes” to revert the model back to its original state.